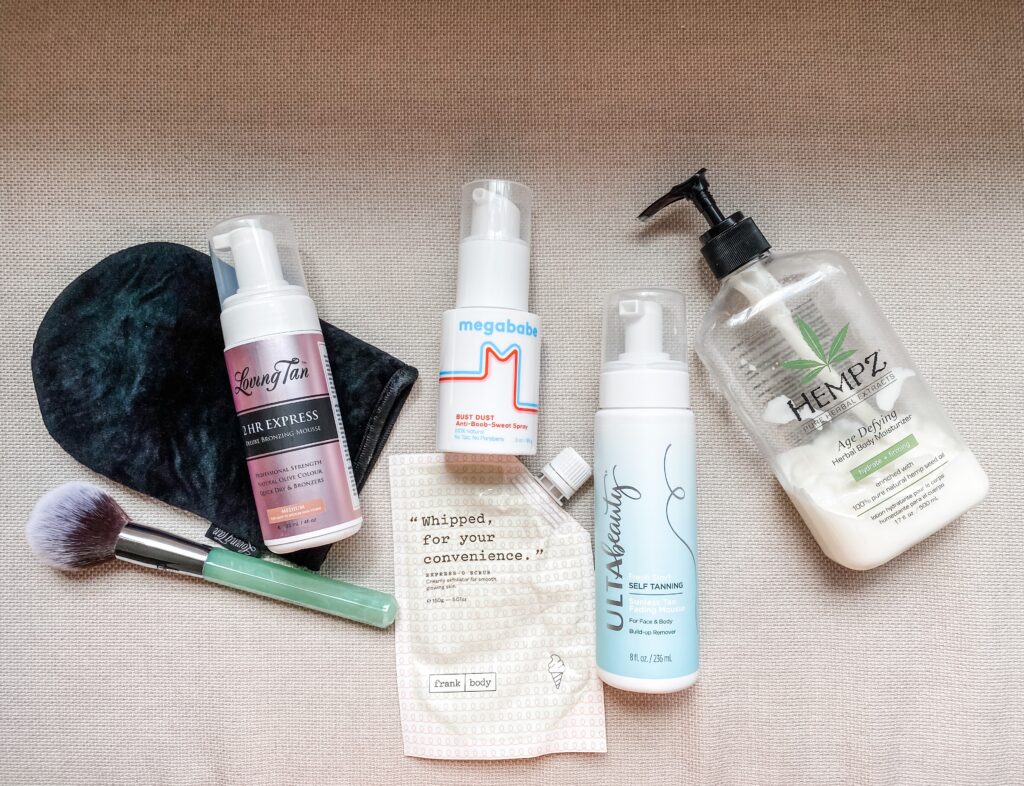
At home self tanning can sound very intimidating. I’ve been using some sort of self tanner for the last five years or so. That means I’ve tried just about every product under the sun trying to achieve that sun kissed look without stepping foot outside. On this post I’m going to share my pre-tan routine, how I apply my self tanner, and the steps I take after to keep my fake tan lasting days on end.
THE PRE-TAN ROUTINE
First things first: if you have any at home self tanning product on your body at all, you 100% need to use a self tan removal product of some sort before you apply a new one. My favorite remover is the Ulta Sunless Tan Fading Mousse. I follow the directions exactly as they are on the bottle, and it works like a charm. It does take some gentle scrubbing, but it gets the job done. I apply it to my body before I get in the shower, and let it sit for 15 minutes. Once I’m in the shower, I take a wet washcloth and go to work getting my previous tan off. I usually do this step the day before I plan on applying a new self tan to allow my skin time to calm down.
On the day I’m going to apply a new self tan, I make sure I shave, exfoliate, and moisturize. These steps are so important, please don’t skip any of them! For shaving, I use the Billie razor. It really is as good as anyone says it is. I get the closest shave of my life, and it never irritates my skin. They are $9 and replacement razors come in the mail as long as you have an active subscription. After I shave, I exfoliate using Express-O Coffee Scrub. It’s a whipped cream that has actual coffee grounds in it which is why it makes for such a good exfoliant. When I get out of the shower, I make sure to moisturize my entire body. Most people just do their elbows and knees (where self tan tends to build up), but I like to do my entire body. It not only helps my tan go on evenly, but I truly think it makes it last longer. My favorite lotion is Hempz Herbal Body Moisturizer, but any lotion works.
APPLYING THE SELF TANNER
BEFORE YOU START! Make sure you have enough self tanner for a complete application. I can’t tell you how many times I’ve started then realized I didn’t have enough to finish. Don’t be like me!
My favorite self tanner is Living Tan 2 Hour Express Tanning Mousse. in medium. I love a mousse because it’s so easy to apply and goes on dark enough so you can tell if you’ve missed a spot. I pump two to three pumps of the self tanner onto an applicator mitt and apply to my body in a circular motion until it’s completely rubbed in taking caution not to apply too much to elbows and knees. I do my neck and apply any left over tanner to my face. When my body is completely finished, I use a powder brush to apply self tanner to my hands and feet. I make a claw with my hands to make sure I get in every crevice of my knuckles.
Before I get dressed, I take Megababe Bust Dust and pump some anywhere my body bends. In the crook of my arm, my elbows, behind my knees, my wrists, and ankles. This prevents the tanner from drying weird.
If you make a mistake or see a streak, just take a tiny bit of lotion on your mitt and buff it out in a circular motion. It will be fine, you’ll be fine, everything is fine. At home self tanning takes some practice, and it may not be 100% perfect on your first go around.
POST TAN MAINTENANCE
The self tanner I use only takes two hours to work, so at the two hour mark you are free to rinse off in the shower. I like to leave it on for longer though, sometimes even overnight. When I’m ready to rinse it off, I jump in the shower using warm water (not too hot!) and rinse my body off completely using NO soap. Pat yourself dry (do not rub) with a towel, and moisturize your body again using your favorite lotion. This is the key to keeping your tan look even and beautiful for several days. My tan will normally last 5-7 days before it starts getting patchy. After your applicator mitt has dried, wash it with hot water & soap.
You can shop all my favorite products in this post or on my LTK! Go forth and glow!
